Microsoft Edge là một trình duyệt web được phát triển bởi Microsoft. Nó được đưa vào Windows làm trình duyệt mặc định thay thế Internet Explorer. Nó nhẹ hơn và có nhiều tính năng hơn so với Internet Explorer như tích hợp với Cortana và đọc ghi chú, v.v.
Gần đây, sau khi cập nhật hệ điều hành Windows 10, nhiều người dùng báo cáo rằng Edge không khởi động được và liên tục tự tắt mà không có bất kỳ lời nhắc nào. Có thể có nhiều lý do cho vấn đề này. Bắt đầu các giải pháp từ đầu và làm việc theo cách của bạn.
Lưu ý: Edge gặp sự cố sau Bản cập nhật Fall Creators (1709) được giải quyết ở cuối bài viết.
Giải pháp 1: Khởi động sạch PC của bạn
Nếu đây là lần đầu tiên bạn gặp sự cố với Microsoft Edge, bạn nên khởi động lại máy tính của mình. Nếu nó không mang lại bất kỳ cải thiện nào, chúng ta có thể thử Khởi động sạch. Khởi động này cho phép PC của bạn bật với một bộ trình điều khiển và chương trình tối thiểu. Chỉ những cái cần thiết mới được bật trong khi tất cả các dịch vụ khác đều bị tắt.
- Nhấn Windows + R để khởi chạy ứng dụng Run. Gõ “ msconfig ” vào hộp thoại và nhấn Enter.

- Điều hướng đến tab Dịch vụ hiện ở đầu màn hình. Kiểm tra dòng có nội dung “ Ẩn tất cả các dịch vụ của Microsoft ”. Sau khi bạn nhấp vào đây, tất cả các dịch vụ liên quan của Microsoft sẽ bị vô hiệu hóa để lại tất cả các dịch vụ của bên thứ ba.
- Bây giờ hãy nhấp vào nút “ Tắt tất cả ” ở cuối gần bên trái của cửa sổ. Tất cả các dịch vụ của bên thứ ba bây giờ sẽ bị vô hiệu hóa.
- Nhấp vào Áp dụng để lưu thay đổi và thoát.

- Bây giờ điều hướng đến tab Khởi động và nhấp vào tùy chọn “ Mở Trình quản lý Tác vụ ”. Bạn sẽ được chuyển hướng đến trình quản lý tác vụ, nơi tất cả các ứng dụng / dịch vụ chạy khi máy tính của bạn khởi động sẽ được liệt kê.

- Chọn từng dịch vụ một và nhấp vào “ Tắt ” ở phía dưới bên phải của cửa sổ.

- Bây giờ khởi động lại máy tính của bạn và kiểm tra xem Edge đã khởi chạy thành công chưa. Nếu có, điều đó có nghĩa là có một chương trình bên ngoài đang gây ra sự cố. Tìm kiếm trong các chương trình đã cài đặt của bạn và xác định ứng dụng nào đang gây ra sự cố của bạn.
Giải pháp 2: Vô hiệu hóa Trusteer Rapport
Trusteer Rapport là một phần mềm bảo mật được thiết kế để bảo vệ dữ liệu bí mật khỏi phần mềm độc hại và lừa đảo. Nó có các phương pháp chống lừa đảo chuyên sâu được triển khai và nó bảo vệ người dùng khỏi hầu hết các loại tấn công. Nó ngay lập tức cảnh báo các hoạt động đáng ngờ và luôn đảm bảo rằng trang web an toàn trước khi bạn nhập thông tin đăng nhập của mình.
Có vẻ như sau bản cập nhật Windows, Trusteer Rapport bắt đầu xung đột với Microsoft Edge. Chính sách “Bảo vệ trình duyệt sớm” bằng cách nào đó xung đột với Edge và không cho phép nó khởi động. Chúng tôi có thể thay đổi chính sách hoặc vô hiệu hóa Trusteer Rapport và kiểm tra xem Edge có hoạt động như mong đợi hay không.
- Nhấn Windows + S để khởi chạy thanh tìm kiếm của menu bắt đầu và nhập “ Trusteer ”. Chọn tùy chọn “ Bảng điều khiển bảo vệ điểm cuối Trusteer ” kết quả trả về và mở nó.
- Khi bảng điều khiển được khởi chạy, hãy nhấp vào mũi tên màu xanh lục ở phía dưới cùng bên phải của màn hình. Bạn sẽ được điều hướng đến trang tiếp theo.

- Bây giờ hãy nhấp vào “ Chỉnh sửa chính sách ” có trong tab Chính sách bảo mật ở trên cùng bên trái của màn hình.

- Bây giờ bạn sẽ được cấp một hình ảnh xác thực để đảm bảo rằng bạn là một con người. Nhập các ký tự như đã cho và nhấn Ok để tiếp tục.
- Một cửa sổ mới sẽ bật lên bao gồm tất cả các chính sách bảo mật của ứng dụng. Duyệt qua chúng cho đến khi bạn tìm thấy mục nhập “ Bảo vệ trình duyệt sớm ”. Nhấp vào menu thả xuống và chọn “ Không bao giờ ” từ danh sách các tùy chọn có sẵn.

- Nhấn Lưu để thực hiện tất cả các thay đổi của bạn và thoát. Khởi động lại máy tính của bạn và kiểm tra xem Edge có hoạt động như mong đợi hay không.
Lưu ý: Bạn có thể thử gỡ cài đặt Trusteer Rapport nếu việc thay đổi chính sách không hoạt động. Chúng tôi khuyên bạn nên kiểm tra cạnh của mình sau khi gỡ cài đặt Trusteer trước khi tiếp tục các giải pháp sau.
Giải pháp 3: Chạy trình kiểm tra tệp hệ thống
System File Checker (SFC) là một tiện ích có trong Microsoft Windows, cho phép người dùng quét máy tính của họ để tìm các tệp bị hỏng trong hệ điều hành của họ. Công cụ này đã có trong Microsoft Windows kể từ Windows 98. Đây là một công cụ rất hữu ích để chẩn đoán sự cố và kiểm tra xem có vấn đề nào là do tệp bị hỏng trong windows hay không.
Chúng tôi có thể thử chạy SFC và xem sự cố của bạn có được giải quyết hay không. Bạn sẽ nhận được một trong ba phản hồi khi chạy SFC.
- Windows không tìm thấy bất kỳ vi phạm tính toàn vẹn nào
- Bảo vệ tài nguyên Windows đã tìm thấy các tệp bị hỏng và sửa chữa chúng
- Bảo vệ tài nguyên Windows đã tìm thấy các tệp bị hỏng nhưng không thể sửa một số (hoặc tất cả) chúng
- Nhấn Windows + R để khởi chạy ứng dụng Run. Nhập “ taskmgr ” vào hộp thoại và nhấn Enter để khởi chạy trình quản lý tác vụ trên máy tính của bạn.
- Bây giờ hãy nhấp vào tùy chọn Tệp hiện ở phía trên bên trái của cửa sổ và chọn “ Chạy tác vụ mới ” từ danh sách các tùy chọn có sẵn.

- Bây giờ gõ “ powershell ” trong hộp thoại và kiểm tra các tùy chọn bên dưới, trong đó nêu “ Tạo công việc này với đặc quyền quản trị ”.

- Khi ở trong Windows Powershell, hãy nhập “ sfc / scannow ” và nhấn Enter . Quá trình này có thể mất một chút thời gian vì toàn bộ tệp Windows của bạn đang được máy tính quét và được kiểm tra các giai đoạn bị hỏng.

- Nếu bạn gặp phải lỗi trong đó Windows cho biết rằng nó đã tìm thấy một số lỗi nhưng không thể khắc phục chúng, bạn nên nhập “ DISM / Online / Cleanup-Image / RestoreHealth ” trong PowerShell. Thao tác này sẽ tải xuống các tệp bị hỏng từ máy chủ cập nhật Windows và thay thế các tệp bị hỏng. Xin lưu ý rằng quá trình này cũng có thể tiêu tốn một khoảng thời gian tùy theo kết nối internet của bạn. Đừng hủy ở bất kỳ giai đoạn nào và để nó chạy.
Nếu lỗi được phát hiện và đã được khắc phục bằng các phương pháp trên, hãy khởi động lại máy tính của bạn và kiểm tra xem thanh tác vụ có bắt đầu hoạt động bình thường hay không.
Giải pháp 4: Cài đặt lại Edge
If the repairing of Microsoft Edge doesn’t work, we can try reinstalling it. Since Edge is installed by default on Windows 10, it cannot be uninstalled using the conventional method we use for other applications. We have to navigate to the file location of Edge, take ownership, and deleting the folders. Then we can install Edge again using Powershell.
- Press Windows + R to launch the Run application. Type “C:\Users\%username%\AppData\Local\Packages\Microsoft.MicrosoftEdge_8wekyb3d8bbwe” in the dialogue box and press Enter to navigate to the file location.
- Once in the file location, navigate back to Packages and takeownership of the folder we just accessed. Follow the steps on how to take ownership of folders using this guide.

- Once you have ownership, you can easily delete all the folders. This will uninstall Microsoft Edge.

- Now press Windows + S to launch the search menu and type “Powershell” in the dialogue box. Right click on the first result and select Run as administrator.
- Now type the following command in the console and press Enter. The process might take a while as this command tries to install all the default applications which are present when you install a new version of Windows 10. Be patient and let the process complete.
Get-AppXPackage -AllUsers -Name Microsoft.MicrosoftEdge | Foreach {Add-AppxPackage -DisableDevelopmentMode -Register "$($_.InstallLocation)\AppXManifest.xml" -Verbose}
- Now restart your computer and check if Microsoft Edge works.
Solution 4: Changing the Group Policy (Post 1709 Update)
The solutions listed below are written for post-1709 (Creators Fall Update) which caused a lot of problems for edge users.
Another aspect that seems to conflict with the Edge browser was the GPO settings regarding “Allow extensions”. It seems that after the update, this setting is not configured properly and causes Edge to crash randomly. We can try editing the policy and check if this fixes anything.
- Press Windows + R to launch the Run application. Type “gpedit.msc” in the dialogue box and press Enter.
- Once in the Group Policy Editor, navigate to the following path:
Computer Configuration > Administrative Templates > Windows Components > Microsoft Edge
- Look for the policy named “Allow Extensions” present at the right side of the window. Double-click it to change its settings.

- Change the policy setting to “Not Configured”. Press Ok to save changes and restart your computer. Check if Edge started working as expected.

Solution 5: Editing the Registry (Post 1709 Update)
Another workaround for the same problem (Allow extensions) is to edit the registry. This solution is recommended for users who don’t have GPE installed on their machines. This will perform the same functionality as the previous solution. However, you can still give it a shot of the previous one didn’t work.
- Press Windows + R to launch the Run application. Type “regedit” in the dialogue box and press Enter.
- Once in the registry editor, navigate to the following file path:
HKEY_LOCAL_MACHINE\SOFTWARE\Policies\Microsoft\MicrosoftEdge\Extensions
- At the right side of the screen, you will see an entry “Extensions Enabled” with the DWORD value most probably “00000000”. Double-click it and change its value to “1”.
You can even delete the registry value after backing it up by right-clicking the “MicrosoftEdge” folder (at the navigation panel at the left side of the window) and selecting “Export”. This way you can always revert changes if things don’t go as expected.

- Restart your computer after applying the changes and check if this solves the problem at hand.
Solution 6: Adding a Registry Key using Command Prompt (Elevated) (Post 1709 Update)
If all the above solutions don’t work, we can try adding a key using an elevated command prompt into your registry. Do note that this process requires administrator account so don’t try executing it in a limited one. We will add a registry key to users in this method. Make sure to backup or create a restore point before attempting this method. If things don’t work out, you can easily restore the previously saved session of your OS.
- Press Windows + S to launch the Search bar. Type “command prompt” in the dialogue box, right-click on the result and select “Run as administrator”.
- Once at the command prompt, execute the following instruction:
reg add “HKCU\Software\Microsoft\Internet Explorer\Spartan” /v RAC_LaunchFlags /t REG_DWORD /d 1 /f

- Restart your computer and check if the problem got solved.
Solution 7: Resetting Edge Settings
Another thing to try before we move on to more technical and tedious solutions is resetting Edge settings completely. There are numerous instances where because of some minor problems or technicalities, Edge doesn’t open as expected.
The settings are mostly internal and get initialized automatically. These settings may sometimes have some bad configurations which might be conflicting internally. You can easily reset Edge settings using the steps below:
- Right-click on the Start menu and then select Apps and Features.
- Now, click on Microsoft Edge and then select Advanced options.
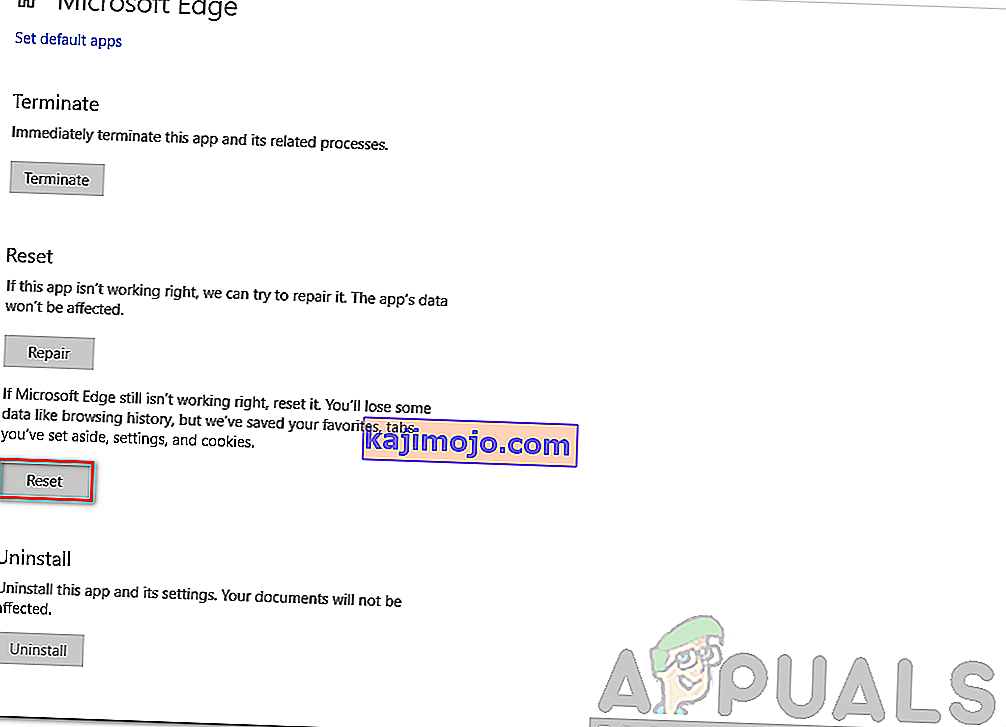
- Click on Reset.
- Restart your computer completely and then check if the issue is resolved for good.


Solution 8: Power-cycling your Computer
Another thing to try is power cycling your computer completely. Power cycling is an act in which you completely restart your computer by removing the power cord as well. This will remove all the temporary settings that your operating system has stored and will reinitialize them. If Edge is not opening because of this, it will be fixed.

Save all your work and shut down your computer. Now, take out the power cord from your PC or the battery from your laptop. Press and hold the power button for about 15 seconds before starting your computer again and checking if the issue is resolved and you can use Edge properly.
Solution 9: Creating a new User Account
Another thing which we can try is creating a new user account in your computer. Every Microsoft service is connected to the account you are accessing it with. Its configurations and preferences are bound to the local account. Here, if you have issues with your user account, it can cause Edge not to start as expected.
After creating a new user account, restart your computer and log into it and check if Edge works properly.
Solution 10: Reinstall Windows
If none of the above methods work, we can consider reinstalling Windows completely. Edge is pre-installed in Windows and when you reinstall it, everything gets refreshed and gets reinitialized as well. This will erase all your System drive files so make sure you backup all your preferences and other data before proceeding.
After repair installing Windows, log into your new account and enjoy Edge. You can restore your data back after you verify that Edge is working as expected.